Eden TDL25R Plus Expert Review
Eden products, Knivesandtools’ own brand have definitely proven their worth over the years and conquered a strong position in the range. In addition to a substantial amount of knives, bins and kitchen tools there are also various Eden flashlights. Developed and extensively tested by the people at Knivesandtools for, as its target group, bobbies and security personnel. However, in time ‘civilian editions’ were added to the range as well, perfect for everyday use. When Knivesandtools asked me to test my first Eden light ever, I was definitely curious! In this review I will share my personal feelings about one of the latest models, the Eden TDL25R Plus. Spoiler alert: I never held a flashlight that can so easily be adjusted to a user’s wishes! But more about that later, with, of course photographs of the light itself and its beam. I will also tell you more about what I think of the light and how it works. Will you join me?
Eden TDL25R Plus specs
Let’s start with the specs that are neatly listed on the website; I will discuss a couple that are key:
- Minimal light output: 1 lumen
- Maximum light output: 1000 lumens
- Beam distance: 340 meters
- LED light: Cree XP-L High Intensity
- Number of light modes: 5
- Additional light modes: beacon, firefly, flashing mode, SOS, stroboscope
- Thickness (body): 2.2 cm
- Thickness (head): 3.4 cm
- Length: 14.9 cm
- Weight: 137 cm
- Works with: 1x 18650 battery or 2x CR123A batteries
Eden TDL25R Plus Unboxing
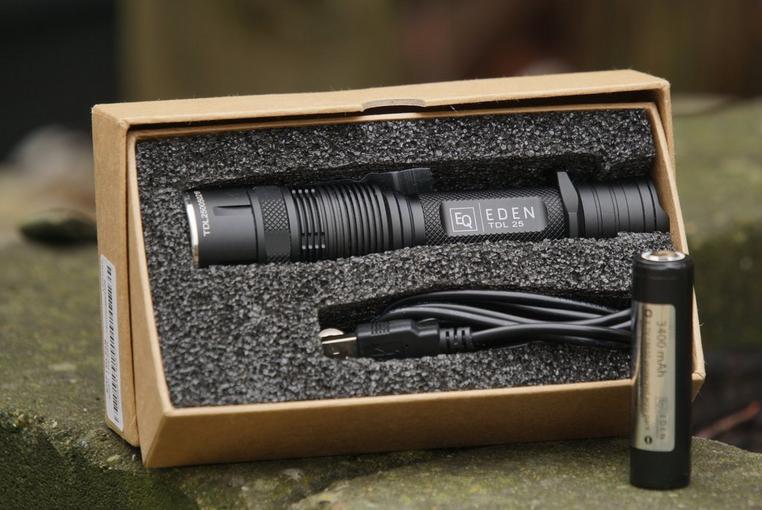
The box the Eden TDL25R Plus comes in doesn’t stand out, neither do the contents. We see the light (including the 3400 mAh battery) and a charging cable. That’s it, but, fair is fair, you don’t need a whole lot more to get started. Perhaps a quick-guide would have been useful because you need to download the manual from the product page. On the website you will find different accessories, amongst which a solid sheath and a practical spiral cord. Good to know: most parts are individually sold to make sure you can easily expand the Eden TDL25R Plus with a charging cable and/or battery. In conclusion: austere, but enough.
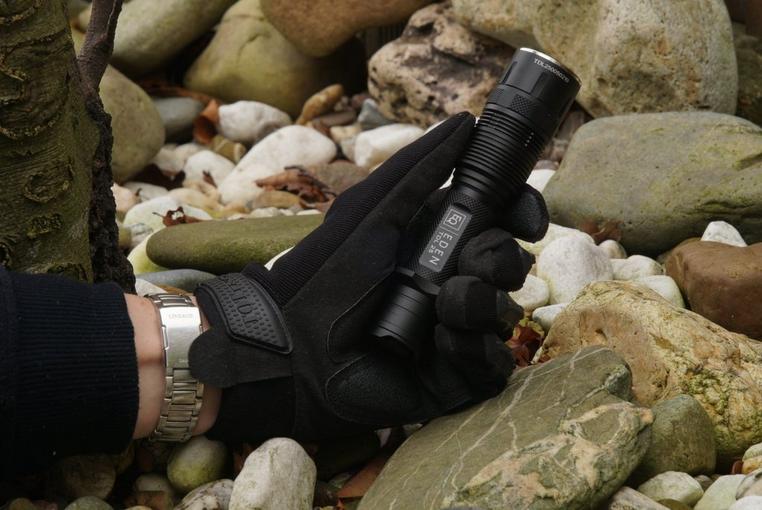
First impressions
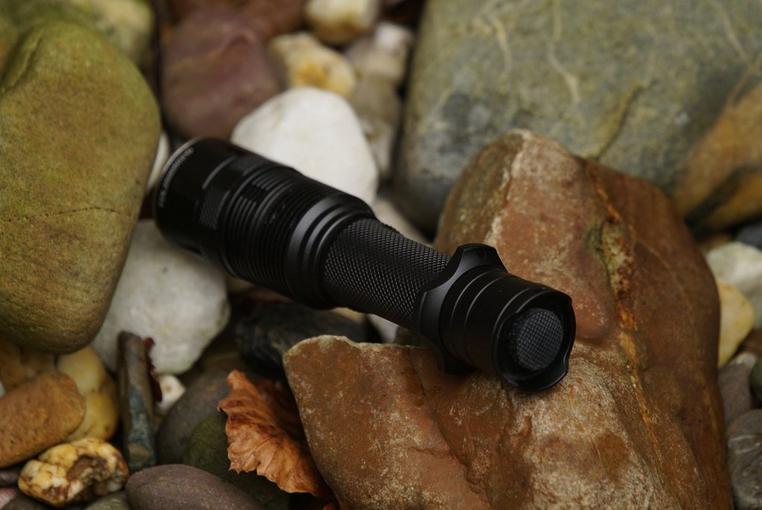
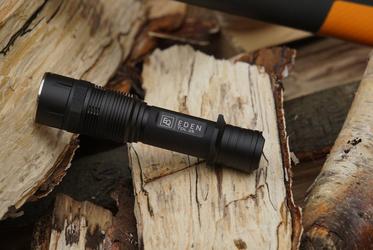
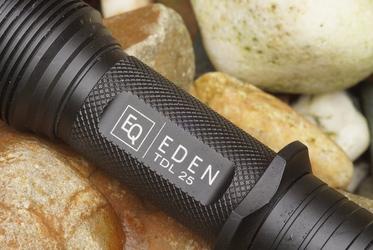
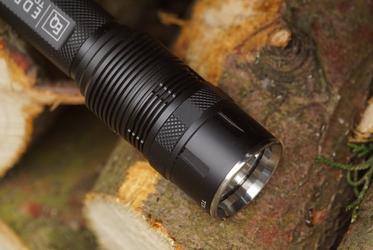
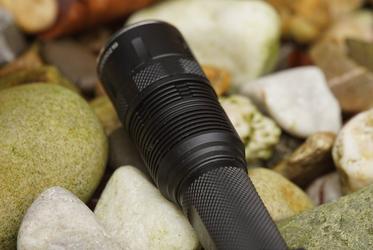
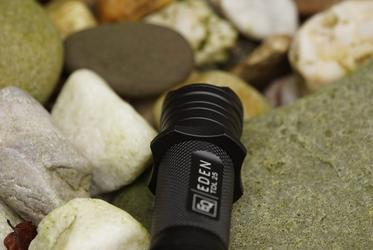
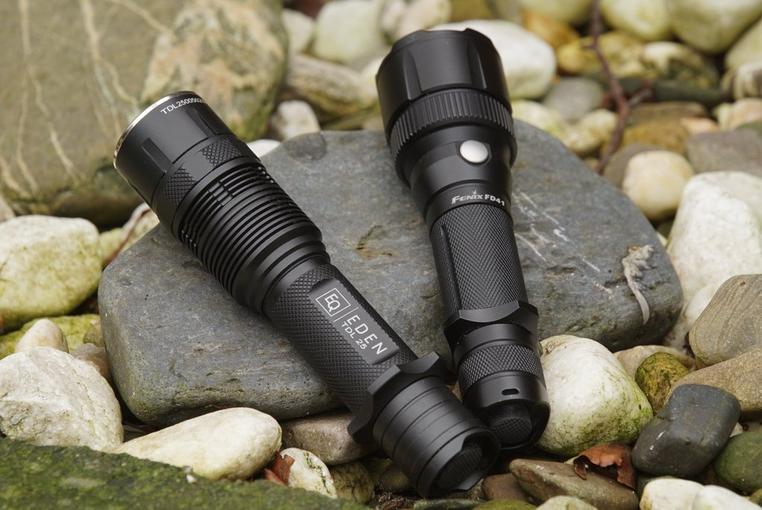
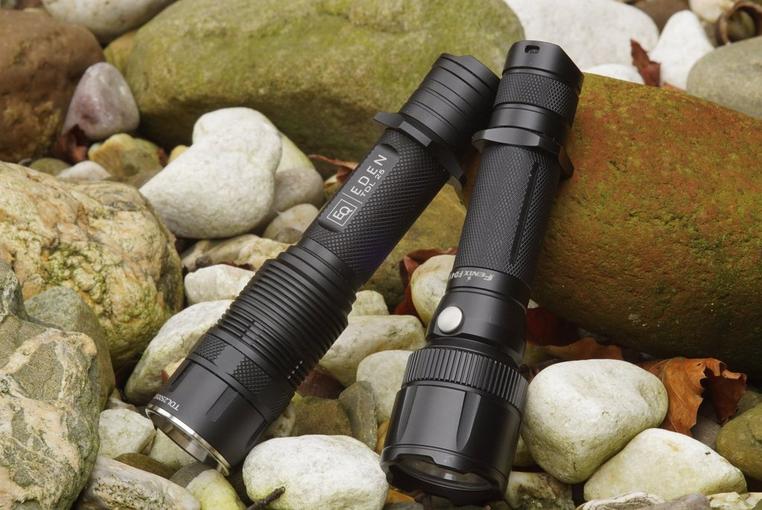
The Eden TDL25R is a medium-sized light; about the size of the Fenix FD41, which is slightly bigger. It fits in your pocket, but feels more comfortable in your coat pocket or in a holster. The first impressions of the TDL25R Plus are very good: the light feels slightly heavy, but that is simply due to the construction quality. The finish is also great: it has a nice matt-black ‘finish’. I always tend to look at a light critically, but I couldn’t find a spot in the black layer or the reflector. The engraving is also properly in place.
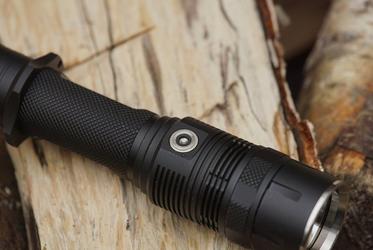
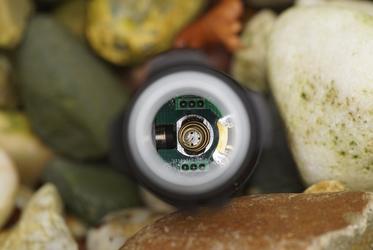
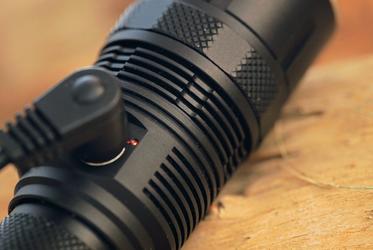
What I immediately noticed was that the head of the light and the body have multiple structures. Ridges in the head of the light for a great discharge of the heat and an intricate structure on the body give the TDL25R Plus enough grip. You can remove the tactical ring, but even when you remove the ring the light still won’t roll away. Striking details in the head of the light are the magnetic charging unit with, next to it, a miniature status light for charging and the rotating ring you can use to control the light. This rotating ring has many options but I will get back to that when I talk more about the controls. The matt-silver edge on the head of the light beautifully fits the design. In the head we spot another remarkable detail: a rubber rim to protect the glass during a fall.
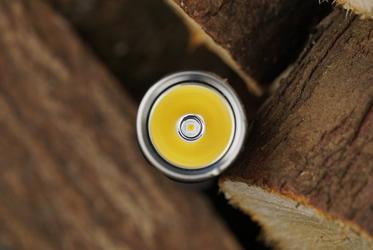
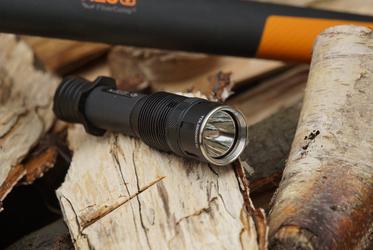
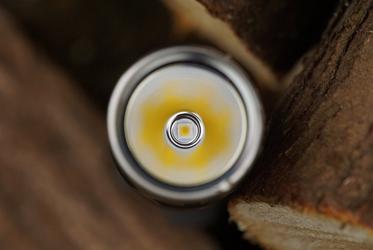
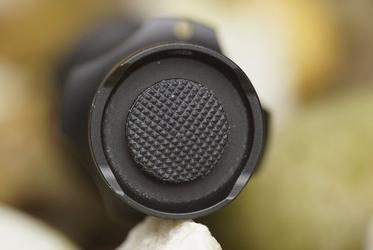
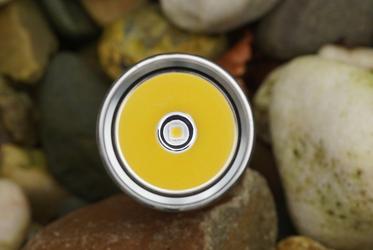
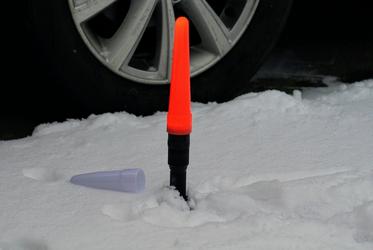
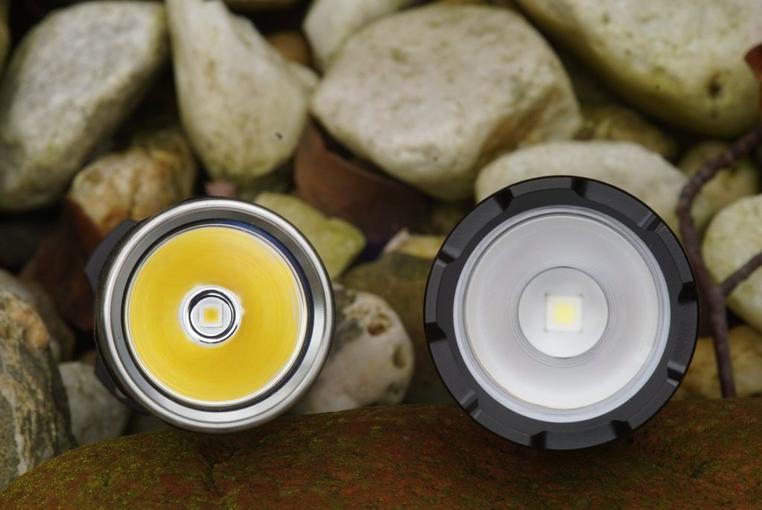
In the head we find a rather deep and smooth reflector, which means that the beam will be narrow and bright. The flat XP-L Hi LED light is properly positioned in the middle which is a plus and, of course, key for the light profile. The LED light looks a little orange which predicts that the colour of the light will be warm. At the back we spot a large switch which, fortunately, doesn’t stick out, but can easily be found. It is also the reason why you can put the light on its base to use it as a candle or beacon. Combined with the optional red or white cones (34 mm) you can use the TDL25R as a beacon: the light has multiple flashing modes. A small eye has been added to the back to attach a spiral cord. The cord can also be attached to the tactical ring which, I feel, could have been a little bigger to make sure you can also attach thicker carrier cords.
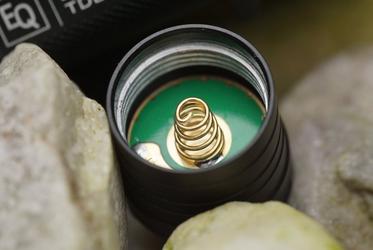
The rubber on the switch has an intricate texture which means your thumb won’t slide of it when you use it. This is fine, just like the clear pressure point. The TDL25R Plus is comprised of three parts; the screw threads look good but it is wise to grease them to extend the life of the light. The end cap and the head have been enhanced with strong springs that absorb the blows. It looks neat on the inside, you can’t say much about that either. To conclude; the quality of the construction and the finish are great. It looks decent and was definitely thought through. Below a couple of photographs to clarify!


Using the Eden TDL25R Plus
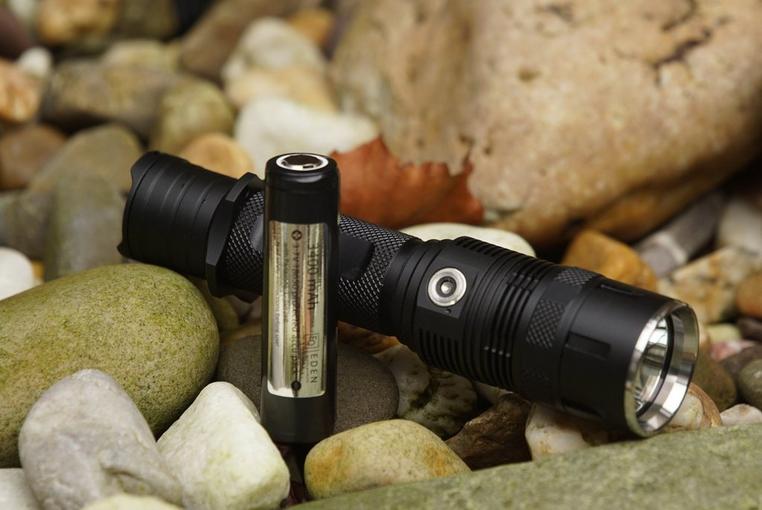
The Eden TDL25R Plus works with a 18650 battery (included) or with two CR123A batteries. I would only use the second option in case of emergencies or when dealing with really cold circumstances. The included Eden 3400 mAh battery has a high capacity and is more than enough for hours of light. It is always a good idea to order an additional battery. They are, in general, reasonably priced and it feels good to have a spare around. You can easily recharge a 18650 battery: the magnetic connector automatically attaches to the loading unit underneath the head of the light. It won’t surprise you to know that any (phone)charger with a USB-port can be used to charge the Eden TDL25R plus; which is great! While charging a small light will burn bright and turn from red to green when the battery is full. Depending on the capacity of the battery charging will take approximately 1.5 to 2.5 hours. You can always check the current battery status, which can be read by how many times the LED light flashes, from one to five times: when it flashes once it is time to recharge the light, when it flashes five times you will have a full battery.
Lights in this range actually have the perfect size: they are easily manageable and not too big for your coat pocket. The slim form and the tactical ring give you enough grip. The light is designed as such that you can always control it with one hand, regardless of how you are holding it. The tactical ring prevents the light from sliding from your hands. When you hold the light in the palm of your hand you can control the modes with your thumb and index finger. If you use the light for tactical purposes you control it with your thumb via the switch on the back.
As I said before the TDL25R can entirely be adjusted to the demands of the user. It looks a bit complicated, but it really is not. I will explain it to you!
Eden TDL25R main modes
The Eden TDL25R plus has three main modes: Regular (standard), Police (police/security) and Momentary (complete control via tactical switch). To set one of these three you simply turn the magnetic ring to the left and loosen the end cap. Remove the battery and put it back after a couple of seconds. Slightly press down the tactical switch with your thumb and use your other hand to simultaneously turn the ring to position 2 (Regular), 3 (Police) or 4 (Momentary). When you let go of the switch the light will confirm your chosen light mode by flashing once (Regular), twice (Police), or three times (Momentary). Depending on how you are going to use the light you can choose the mode you desire.
Please note: When describing the modes I have set the function of the rotating ring to standard; also something you can adjust to your liking, but I will get back to that.
In the Regular mode the ring will function as the ‘main switch’: if it is completely turned to the left the light is off and cannot be turned on with the tactical switch. It does work the other way around: turn the light on with the ring and turn it off with the tactical switch. Momentary (keeping the light on as long as you hold the button) works when you slightly push down but also when you completely push down the switch. When you shortly press down the tactical switch you will also turn on the light the same way as when you would use the ring, with the only difference that you turn the light on and start with the most-recently used mode. Switching between modes can be done by turning the ring or slightly pressing down the switch. You turn the light off by completely (shortly) pressing down the end switch or rotating the ring to the most left position. As you can see, all functions of the light can be controlled using only one hand!
A really cool function is hidden in the Regular mode: when the light is on (regardless of the mode you have chosen) you can, by slightly pressing down the tactical switch, dim the light to end up at a very low mode. With this option you can dim the light to the so-called ‘firefly’ mode. In this mode the battery will last a very long time, and you will always have exactly enough light to see in the dark. You can even adjust this low mode! I will get back to that later on.
If you completely press down the switch and hold it the Eden TDL25R will automatically switch to the highest mode; when the highest and the second highest mode are reached the light will shortly flash. So there are a lot of possibilities and you can accurately set it up. And that isn’t all; we also have the special modes! You turn on the special modes by completely pressing down the switch and turning the ring at the same time. Do watch out, however. When you do, you will first turn on the most recently used mode when the ring is in a different position than completely turned to the left. You will now have the ability to choose between six special options, which also have memory: this means that the light will remember the mode last used.
The modes (from left to right)
-
- Battery status
-
- Flashing mode
-
- Momentary Turbo (when slightly and completely pressing down the highest mode will always be turned on)
-
- Immediately accessible mode with each second a flash with maximum output; the so-called ‘traffic mode’
-
- S.O.S. signal
-
- Stroboscope (slightly pressed down: momentary, completely pressed down: turned on)
Good to know: the flashing modes and the SOS signal can both be dimmed by slightly pressing down, and increase in strength by completely pressing down the switch. As a result you will be able to create a distinctive emergency signal and a slightly less noticeable beacon by using a traffic cone.
As you can see, the Regular mode is the best basis when you use the light on a daily basis. The fact that all functions can be controlled with one hand, the adjustable intensity with firefly and the incredibly cool flashing modes definitely impressed me!
Police Mode
In the Police mode the rotating ring works the same way as in the Regular mode: rotating from left to right you switch between the light modes, from low to high (right). The tactical switch has an important difference in comparison to the regular mode: when you completely press down the switch it will switch to the stroboscope mode, regardless of which mode you came from or in what position the rotating ring resides. As such you can’t go wrong when you are attacked as a bobby or security guard. By slightly pressing down the switch you turn on the light and off in the last chosen mode. The remarkable option here is that you, when you slightly press the switch down again, you can reach the turbo and the firefly mode. As a result you will, even in this mode, control all light modes with the switch on the back of the light. The Police mode doesn’t have a momentary-on mode for the regular light modes. When you completely press down the switch you will always (momentarily) turn the stroboscope mode on. The six special options are the same as in the Regular mode. So less extensive in this mode than the general mode, but great for various purposes such as police work.
Momentary Mode
In the Momentary mode the rotating ring has the same function: you use it to switch to and choose the desired light mode. The tactical switch, however, has a limited function: you can use it to turn off the light, by slightly or completely pressing it down after you have used the ring to turn it on, but any other functions are missing here. As the name of the mode already suggests: the switch is meant to turn on the light as long as you are holding it down. Please note, when you change the light mode via the ring the ‘momentary’ option will no longer work: the light will continue to burn when you release the switch. Momentary is an ideal mode when you want to have optimal control or carry out short checks. In this mode you will also find six special modes: after turning it on once the mode will remain intact (the light will keep burning after you let go of the switch); if you turn the light off and on again, the mode will be momentary. Here you can also decide which option you prefer. This is a practical mode for anyone who wants to turn the light off without having to go through additional steps: when you only use the tactical switch you will never be able to accidentally leave the light on.
Where initially the rotating ring had the same function in all three modes, the TDL25R Plus wouldn’t be so remarkable if you couldn’t also set up the ring to your liking. I already said it before, but here it is again, it is absolutely amazing what this light can do! To change the settings on this ring we will turn it to mode six (so completely to the right) and put the battery inside the light again. After tightening the end cap we will slightly press down the switch and turn the ring at the same time to reach the desired mode. To confirm the chosen mode the light will flash one to six times to make sure you can see if you have choses the right mode. A concise explanation of the modes, starting on the left:
-
- From turned off to the highest mode
-
- Starting at firefly to low, to medium and to turbo; the sixth step: stroboscope
-
- From firefly to turbo in six steps, with firefly divided into four steps
-
- From turned off to firefly, to low, high, turbo and to traffic mode
-
- From turned off to low, high, turbo, traffic mode and high
-
- From turned off to low, high, turbo, stroboscope and momentary
I am sure your favourite mode will be in here somewhere! The possibilities are absolutely remarkable!
It occurred a couple of times that I accidentally turned on the light while I was holding it. But you can also exclude this when you use the Power On On Ring Move. A mouth full; but it simply means that you can deactivate turning on the light with the ring. Turn the ring to position three, remove and reload the battery and slightly press down the switch while you turn the ring to position 1 (off) or 2 (on). To check the light will flash once or twice. As soon as you have deactivated the ring you can only turn on the light via the tactical switch. You can, however, still switch between the light modes via the ring. This option is very practical when you carry the flashlight in your pocket: as such it won’t turn on by itself. I noticed while testing that the light needs about three seconds after you have turned it off to ‘re-activate’ this function. Within that amount of time you can, however, turn on the light by using the ring. But that won’t happen that often I think… So a small little fact, something that isn’t mentioned in the overview. It is a great function, especially when you always carry the light with you.
We saw before that the light can be dimmed to the so-called ‘firefly mode’. It could be possible for you to still feel like the lowest mode (as is standardly used) is still too bright. Attention was also paid to this little detail: you can choose from (at least) eight different modes in the lowest modes. This also works with the already familiar way of setting up the light: turn the ring to position five (we hadn’t used this one yet), remove the battery and reload it and slightly press down the switch. By default the lowest mode is set to five: the light will flash five times after choosing this mode. Turn the ring to the left for a lower mode and to the right for a higher mode. Sounds strange, but that is simply the way it is… As such you can continue this routine until the light flashes once (minimum output) or eight times (lowest mode). You do, however, have to repeat the ritual four times if you want to switch from the middle to the lowest mode; so I suggest that you set it up the way you like it once and don’t change it on a daily basis… When you are in the firefly mode you can divide it into four steps by slightly pressing down the switch. You will now, when the TDL25R Plus is set to mode three (see point three of the story above), have six plus three fixed modes at your disposal!
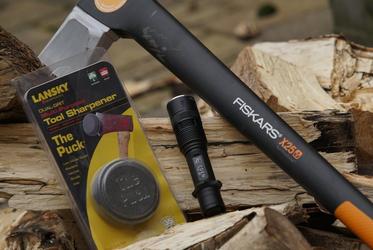
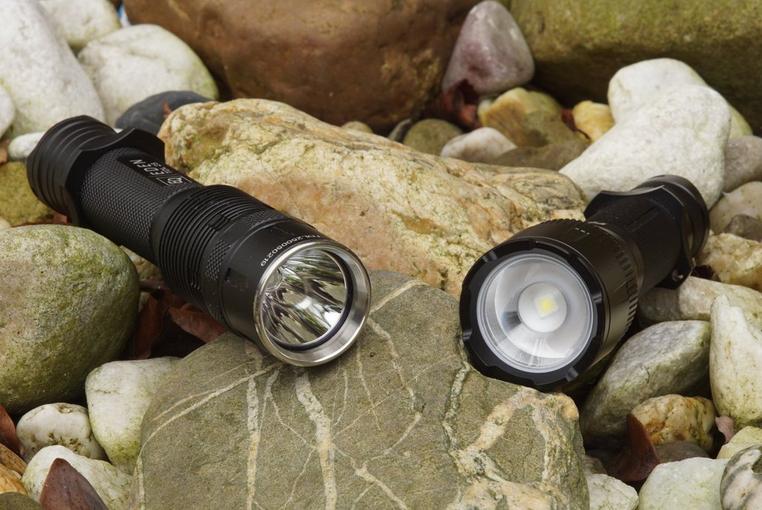
Comparison in size
To give you an indication of its size I have taken a couple of photographs with the TDL25R Plus next to another flashlight, the Fenix FD41. It is funny to see that both not only have practically the same measurements, the specs are also relatively similar. So we will immediately have a fun ‘equivalent’ we can use for the comparison test. Below a couple of photographs!
Colour of the light
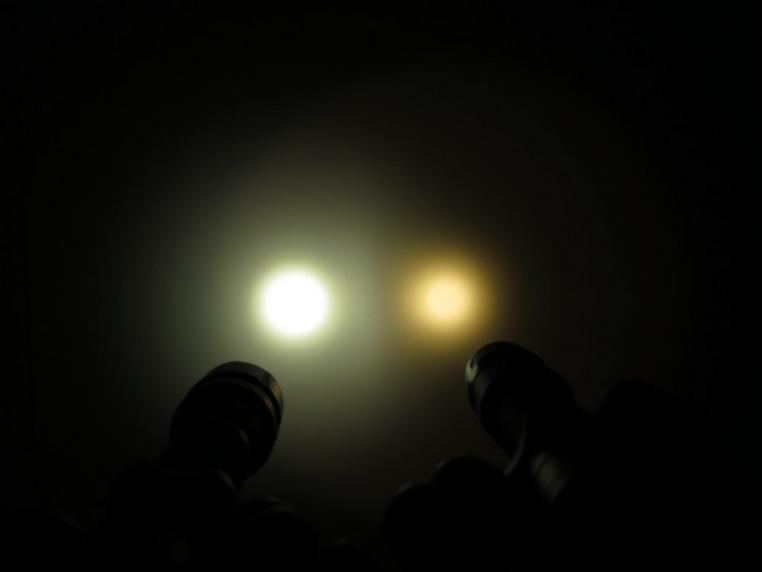
According to the Knivesandtools data the Eden TDL25R Plus has a light colour of 2700 Kelvin. This equals warm-white and it is something you don’t often come across in a flashlight. The warm, yellow colour is a little more blinding; something I tested because I couldn’t find anyone to test it for me… The fact is that a warmer colour works better when humidity increases; when it is foggy out this light will, as such, work better in comparison to cold-white lights. Below a couple of photographs that shows the shade of the TDL25R Plus when you point it at a white wall. To learn more about the colour of the light I held the Fenix FD41 with a cold-white shade next to it.
Light profile
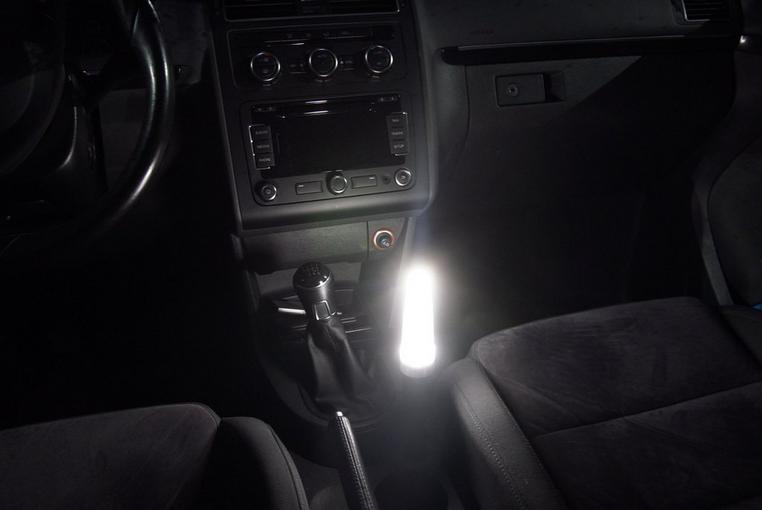
The used Cree XP-L HI LED light guarantees a massive reach combined with a great output. Combined with the relatively deep and smooth reflector you end up with a substantial beam distance. You can see it in the profile: a relatively small, but intense hotspot with a spill around it, the so-called rest light. The transition is sharply outlined; there is hardly any corona present which means you will be able to ‘see’ further. To clarify: when you are standing in a room and the lights are turned on you won’t be able to see as clearly what is happening as when the light is turned off. Later on in this review I will clarify this even more with a couple of photographs. The profile looks decent, no spots or imperfections. It is something I had already anticipated as the LED light is perfectly centred and the reflector doesn’t display any defects.
Beamshots
It is time we see what this light can do! First we will look at the different intensities when we point the light at a white wall, the so-called ‘indoor-beamshots’. The same settings were used for all photographs to make sure we end up with a reliable image, with one difference: the shutter speed used inside is 1/125 seconds and outside 4 full seconds. Note: it could be possible you will hardly see anything in the lower modes, this is a combination of the distance to the wall and the limited output. First of the six standard light modes in the GIF-file.

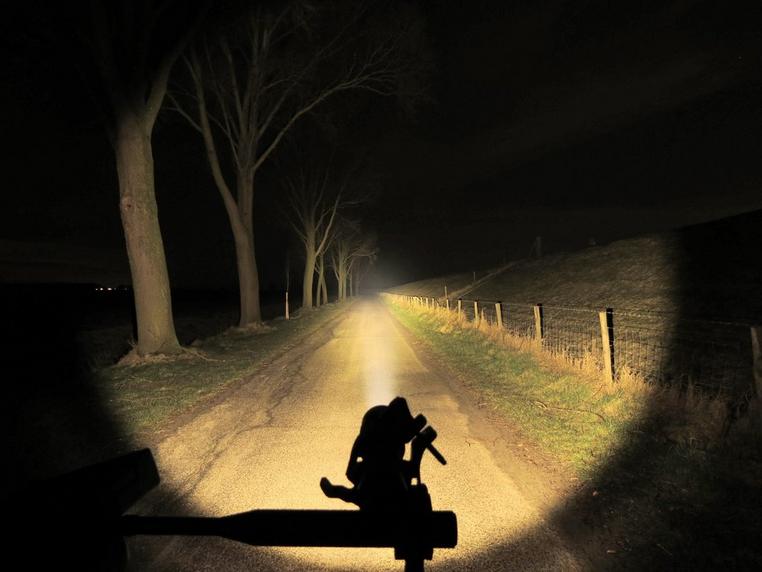
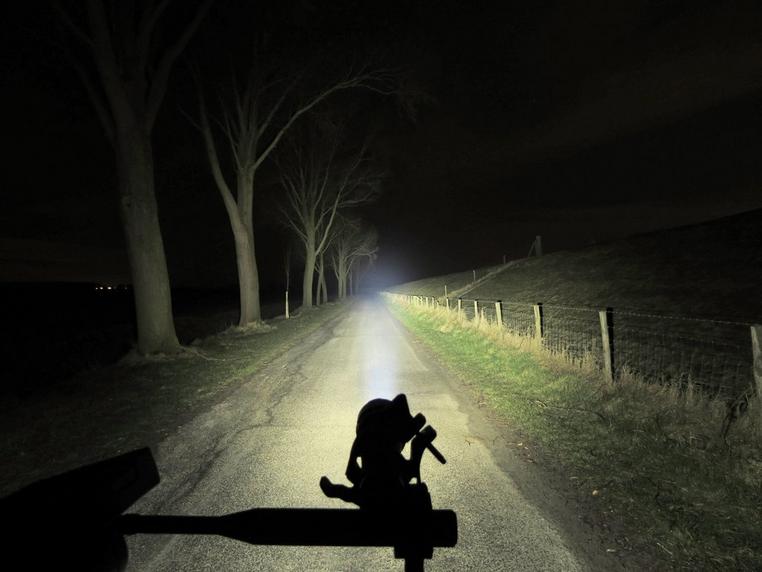
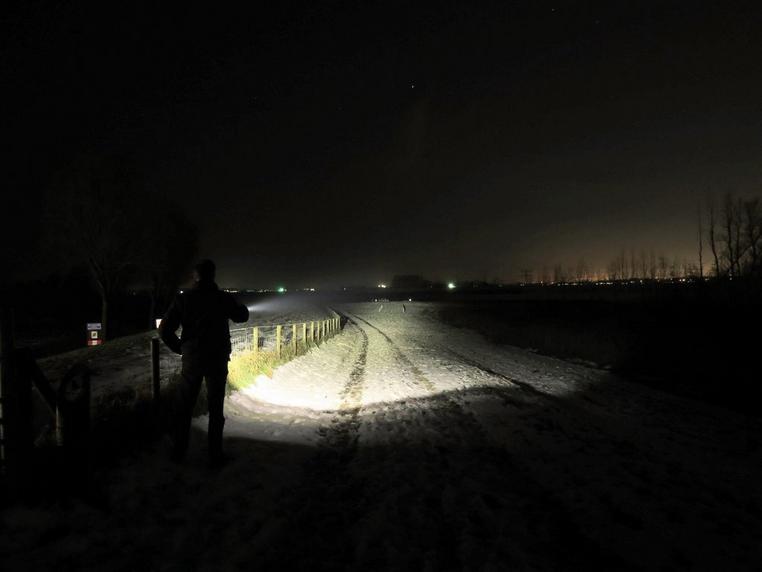
Now let’s head outside. The location is an asphalt road at a dike with a row of trees on the left. Now you can properly see what the light does with different ‘backdrops and surfaces’. Here I also chose the six light modes you can choose by turning the ring. The lower light modes will barely be visible in the photographs, but the images definitely properly represent the reality.
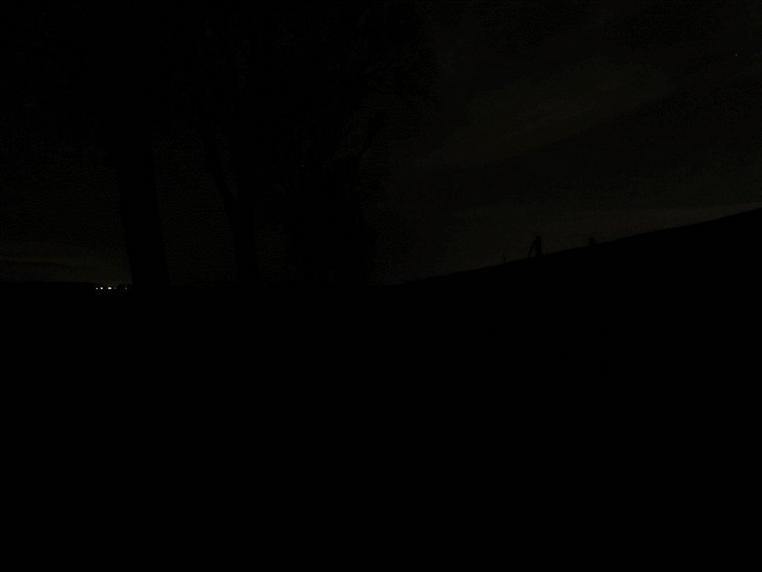
Let’s see how the Eden TDL25R Plus works when compared to the Fenix FD41. Both lights in the highest mode; the distance to the corner is approximately 225 meters. In terms of reach the lights are pretty similar, the light image of the FD41 shows that it has a ‘combined’ lens: more light on the first few meters and a less defined hotspot.
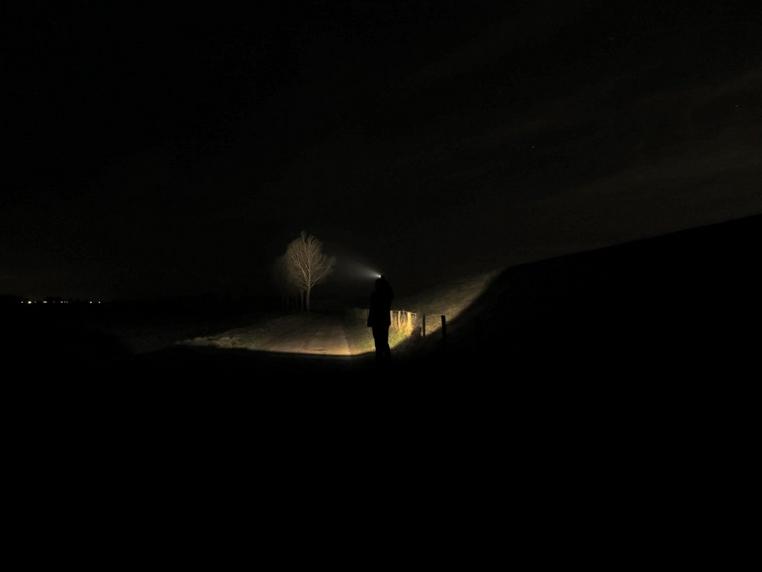
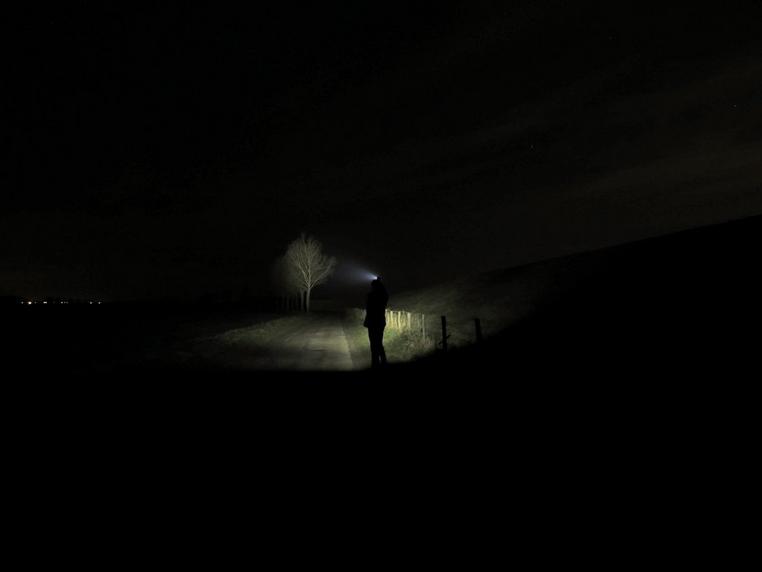
Next location: a tree standing approximately 175 meters away. Here you will again see the difference in the image of the light: the profile of the TDL25R Plus looks more like a ‘light sabre’. Mostly because of its colder colour the beam distance of the FD41 is a little bigger, even though this isn’t incredibly obvious. The lights are fairly similar in terms of beam distance.
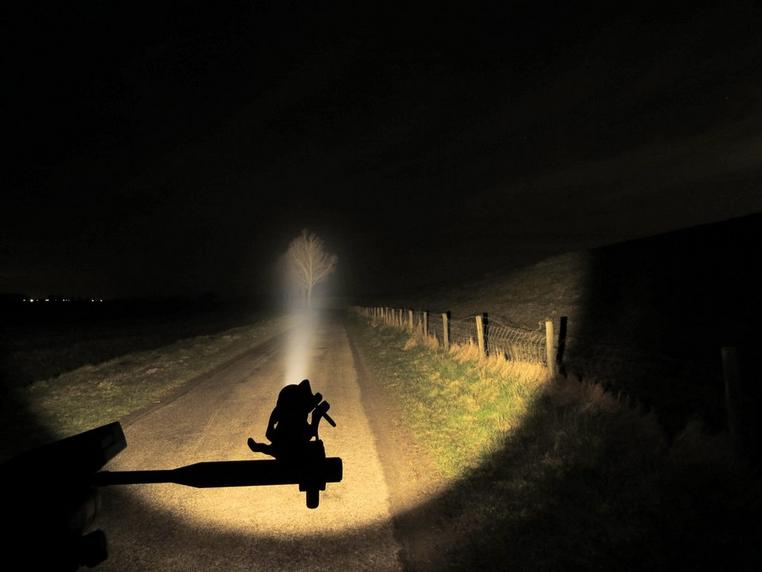
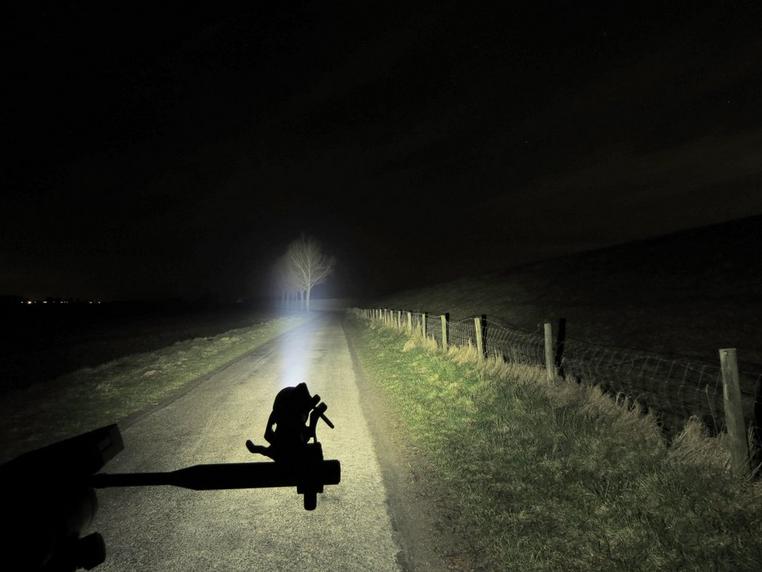
Once again both lights pointed at the tree, but with the camera placed a little further back. Here you can properly see that the beam on the TDL25R Plus starts a little ‘further away’, the FD41 lights up the road and the poles located a little closer by.
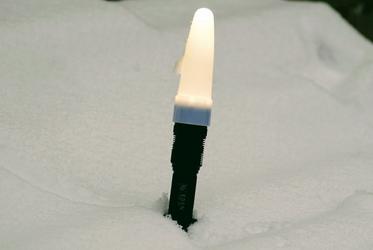
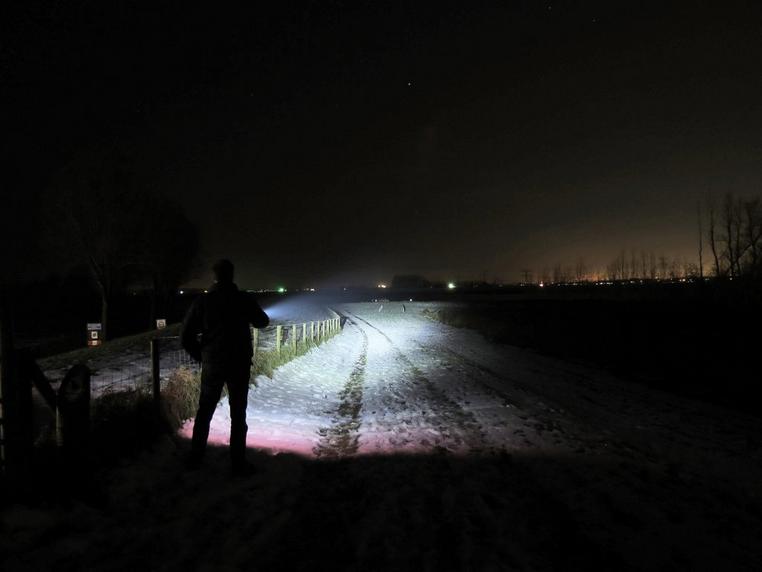
Whenever it has snowed out I need to go outside with my flashlights.. you often get a different effect and a stunning image of the colour of the light. Below you can see that the TDL25R also has a warm colour in the snow; the objects such as the poles are displayed as if the sun is shining down on them. This time I brought another equivalent, the Led Lenser MT14 which also has a cold-white light colour to make sure you will be able to see the difference between the cold and warm colour of the light.
Conclusion
The more I tested the Eden TDL25R Plus the more I started to appreciate it. At first it might look a little austere in terms of light and accessories; and the manual also looks a little complicated. Once you have gotten the hang of it, however, you will discover a light that, in terms of possibilities, is absolute unique! The TDL25R Plus feels great in hand and is made from top-quality materials. One definitely paid attention to the design and the sustainability, always keeping tactical use in mind. So not simply a keychain light to find the lock of your car.. It is something that becomes evident when you look at the light beam: a concentrated beam which can be used to blind another (if necessary), or to reach very far during a nightly search. I personally prefer the Regular-mode, mostly because I use the light in ‘normal’ situations. If you work as a security guard or as a bobby, you can easily change the mode to the one that suits you best. I love the special light and flashing modes on this light, in addition to the option to dim the light to ‘burning ember’ mode and back to turbo. Once you have chosen your favourite mode and set up the light to your liking you will absolutely enjoy all the possibilities. I can definitely recommend the optional diffusers; with these you can easily transform your light into, for instance, a signalling beacon or a camping light. The colour of the light is a little warm, a cold-white version would be a beautiful and relatively easy to realize addition. And a solid base to put the light in when you use it as a beacon would also be a great idea. As is it isn’t as stable on a less flat surface. Another wish: a larger version of this technical marvel.
In conclusion: I am convinced of the qualities of the Eden TDL25R Plus!
Koen van der Jagt
Ever since he could walk Koen has been interested in lights, wires and batteries. As a child he was always working with dyno torches, bike lights and electrical boxes. The krypton and halogen lights were replaced by LED lights. A couple of years ago he discovered the ‘professional’ stuff. His first brands were Led Lenser and Fenix. Photography is also one of his hobbies. In addition to nature and meteorology Koen loves to show others what a light can do and what its beam looks like at night. Koen’s reviews can often be found on forums such as candlepowerforums.com and taschenlampen-forum.de. Throughout the years Koen has collected lights in practically any category: from small and compact to enormous powerhouses.


