How to: felling a tree
Felling (chopping down) a tree is a remarkable experience. It is also one of the most dangerous activities in the world. It is therefore important to know what you are doing and what you need to pay attention to.
Felling trees is something you mostly do in winter. The trees are in hibernation in the colder months which means that the flow of sap from the tree is very low. As such the wood contains less moisture which makes it easier to split and dry. In addition, there are no leaves to clean up and there are fewer bugs that are active in and around the tree.
Type of axe
To fell a tree you need a forestry axe or a felling axe. A splitting axe is not sharp enough and also too heavy to effectively fell a tree with. A felling axe is fastest of all axes when felling a tree. It is, however, heavier than using a forestry axe. When you use a forestry axe it might take a little longer to fell the tree, but it is less intensive.
Determining the direction of the fall
The first step you take as you fell a tree is determining where it should land and creating a safe working environment. You determine the direction of the fall by standing with your back against the trunk and looking up to determine where most branches are, and therefore the most mass. It will be easier for the tree to fall in that direction. The next step is determining where the tree will end up on the ground and if there are any obstacles lying around the tree shouldn't fall on top of. As soon as you determine the right direction, you mark the safe and unsafe zones by drawing lines in the sand. These zones are a no-go once the notch cut is done. Obviously, you will never walk in front of the notch cut. Behind the tree you are also dealing with an unsafe zone. You don't pass it once the notch cut is made. As soon as the tree falls the trunk can move backwards. As such you choose a side before you chop down the tree, and you choose a direction you will move towards once the tree falls.

Determining the notch cut
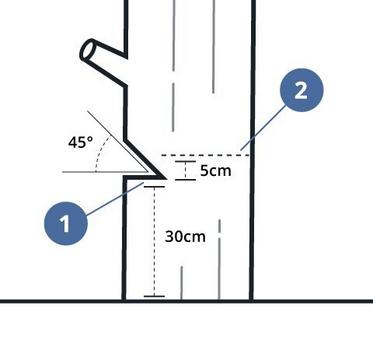
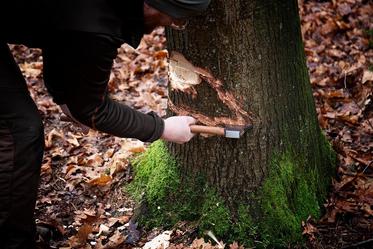
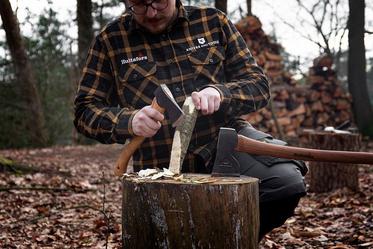
As soon as you have determined the direction of the fall and the safe zones, you mark the notch cut in the bark of the tree. You mark the notch cut about 30 cm from the ground (a little higher if you use a felling axe) and up to 1/3 in the tree. The bottom of the notch cut is as straight as possible. The cut-out itself has a 45-degree angle. This is also how you chop into the tree with the axe. You won't get very far mainly hitting the fibres of the tree. After chopping at an angle a couple of times you remove the material by hitting the tree horizontally a couple of times. Repeat this process until you have cut out the notch cut. Make sure the bottom of the notch cut is as straight as possible to make sure the tree will fall where you want it to. Once again check the angle of the notch cut. Will the tree still fall in the right direction? This is the only time to adjust the angle.

Sawing the felling cut
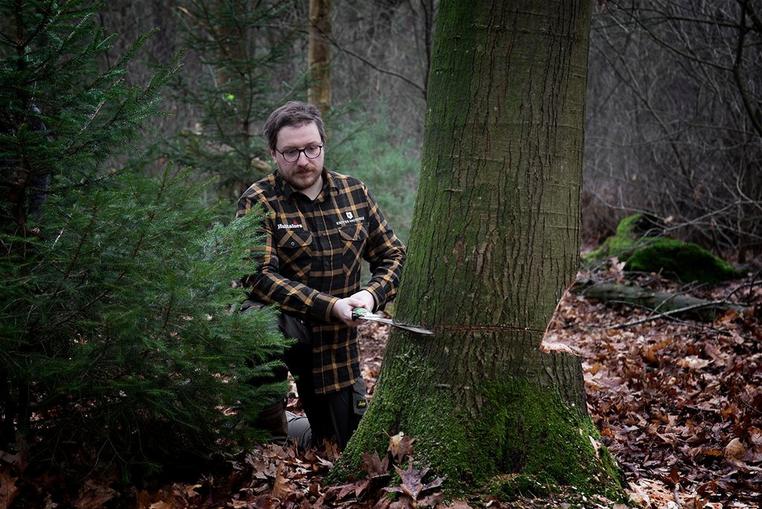
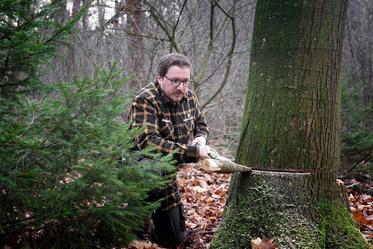
The next step is making the felling cut. As soon as you start creating the felling cut all safety zones are a go. You will only find yourself in the designated and predetermined safety zones. The safest (and best) way is sawing the felling edge. Use a saw that can saw the entire width of the tree. You create the felling cut at the back of the tree. Draw a line around the tree that is located approximately 5 cm above the bottom of the notch cut. As such you can see where you need to saw and whether you maintain a straight line. First saw the entire felling cut a few centimetres in. This is namely the toughest part of the tree. If you don't do this right the tree can turn and still end up on the wrong side. After sawing the first couple centimetres saw straight towards the notch cut. The tree will slowly incline as the felling cut comes closer to the notch cut. Once the felling cut is about 5 cm from the notch cut the tree will fall. The difference in height between the notch cut and felling cut creates a hinge effect that effectively and safely pushes the tree over.
Wedge
When creating the felling cut a wedge can also come in handy. It ensures that your tree will fall down faster and guarantees that the tree will fall in the right direction. Don't use the axe to hit the steel wedge! It could irreparably damage the head of a forestry axe. You only use a metal wedge in combination with a splitting hammer to split large pieces of wood. You use a piece of wood to hit the wedge into the felling cut or you can make your own wedge from a piece of wood.
Chopping the felling cut
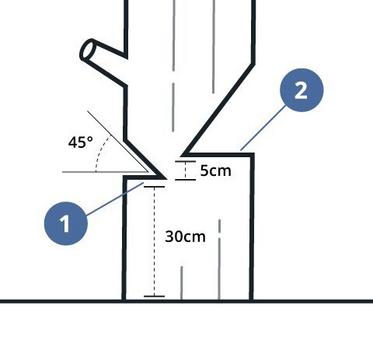
It is also possible to chop the felling cut instead of using a saw. It might take a little longer, but it can happen that you don't have a saw close, or that it unexpectedly breaks. Chopping the felling cut is similar to chopping the notch cut, but only on the other side of the tree and 5 cm higher than the notch cut. You do so by creating a similar cut on the other side of the notch cut. Keep in mind that this cut needs to be 5 cm higher than the notch cut to create that hinge effect. It is important that you, as evenly as possible, remove material in relation to the notch cut.
Finish what you started
Once you start felling a tree you need to finish it. Never leave a tree behind you started to chop down. A tree with a notch cut can easily fall over due to strong wind. Fresh wood is easier to split than wood that has already been out for a while. So don't wait too long before splitting wood after cutting down a tree!
Walking with an axe
You always hold an axe at the handle, just underneath the head of the axe with the edge facing down. As such the edge is facing away from you when you fall. In addition, when you hold it like this you won't hurt yourself as easily. Holding the head of the axe is also an option on a warm summer's day. In the winter the head will feel cold. Any other way of carrying the axe by hand is not safe. Carrying the axe on the shoulder is one of the most popular and also one of the most dangerous ways of carrying an axe. When you drop the axe you can really hurt yourself.


